Search This Blog

Sunday, October 9, 2011

Pet sofa bed

So after moving, you always have tons of boxes left over, right? And they sit in storage (or the corner) until you use them again, because theyre too handy to toss! Well I picked up Trash to Treasure, 2000 edition from a thrift store awhile ago, and theres a neat tutorial to make a cat bed out of a box. Intrigued? Its the perfect Saturday morning project! But I recomend using a stapler, I was out of staples, so I used Mod Podge and tape. If I make another one, I'm using a stapler!

You'll need:
-Mod Podge
-Stapler and staples
-Scrap Fabric ( about a yard total, I had some laying around from that purse I never made)
-A cardboard box. Bigger the critter, bigger the box. My Jack Russel could fit in the box I chose.
-Newspaper to cover your work area.
-Batting or an old towel/blanket
- If you want it to have feet, you will also need 4 spray can caps, and some stuffing to round them out.
-Needle and Thread
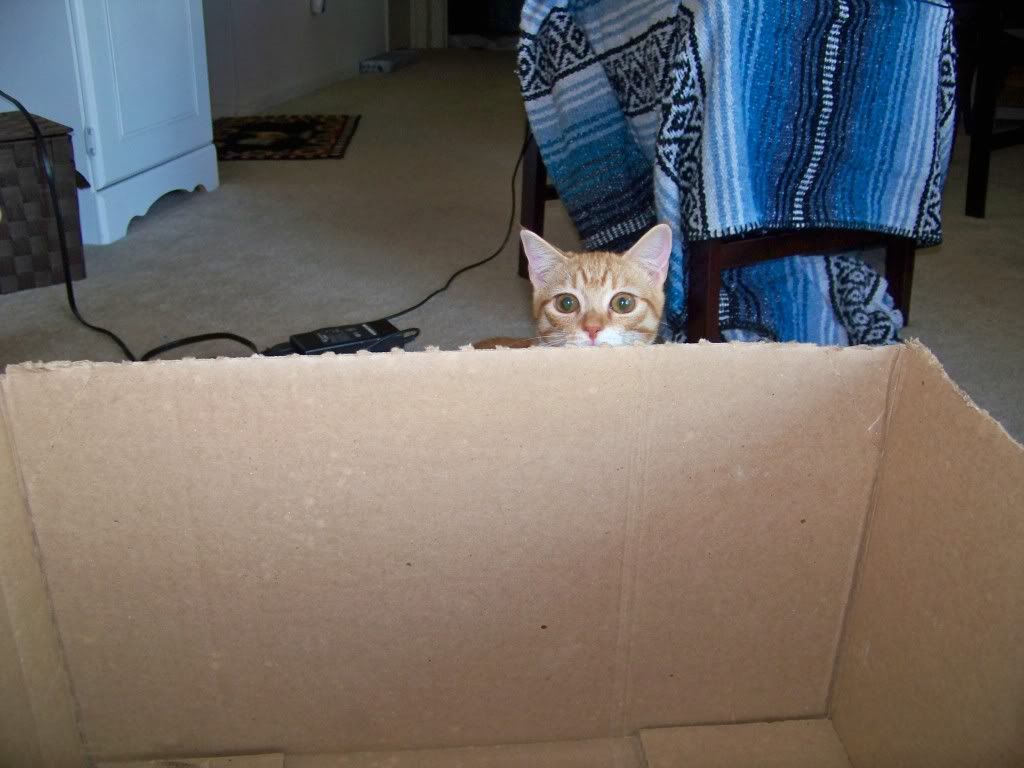
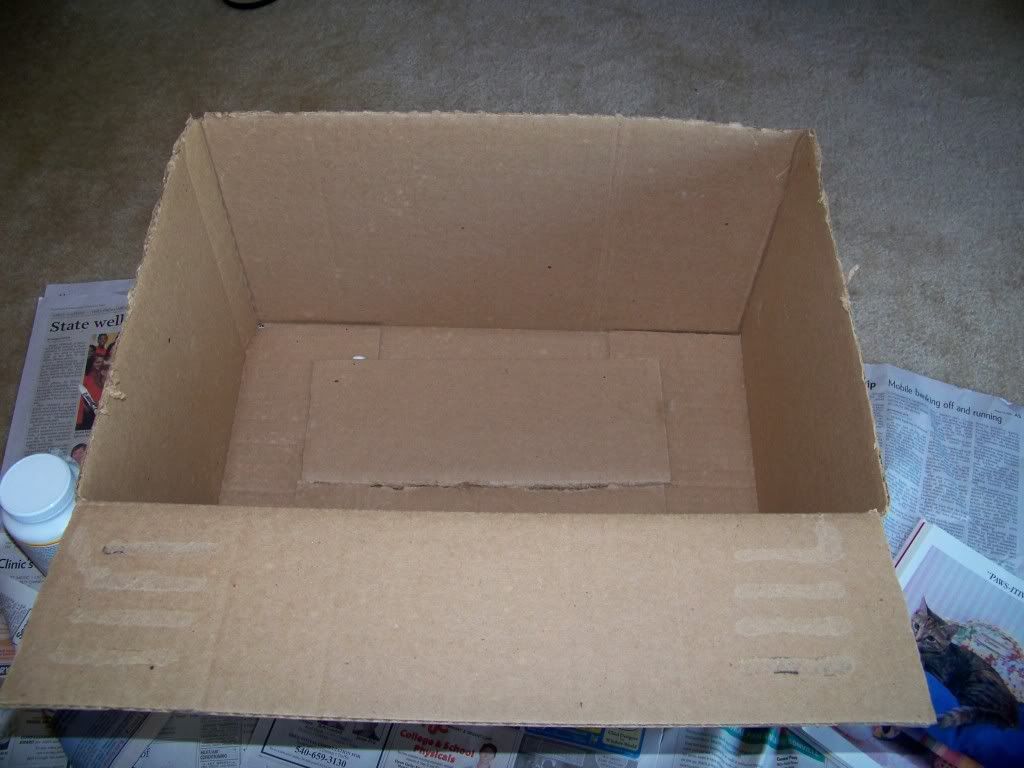
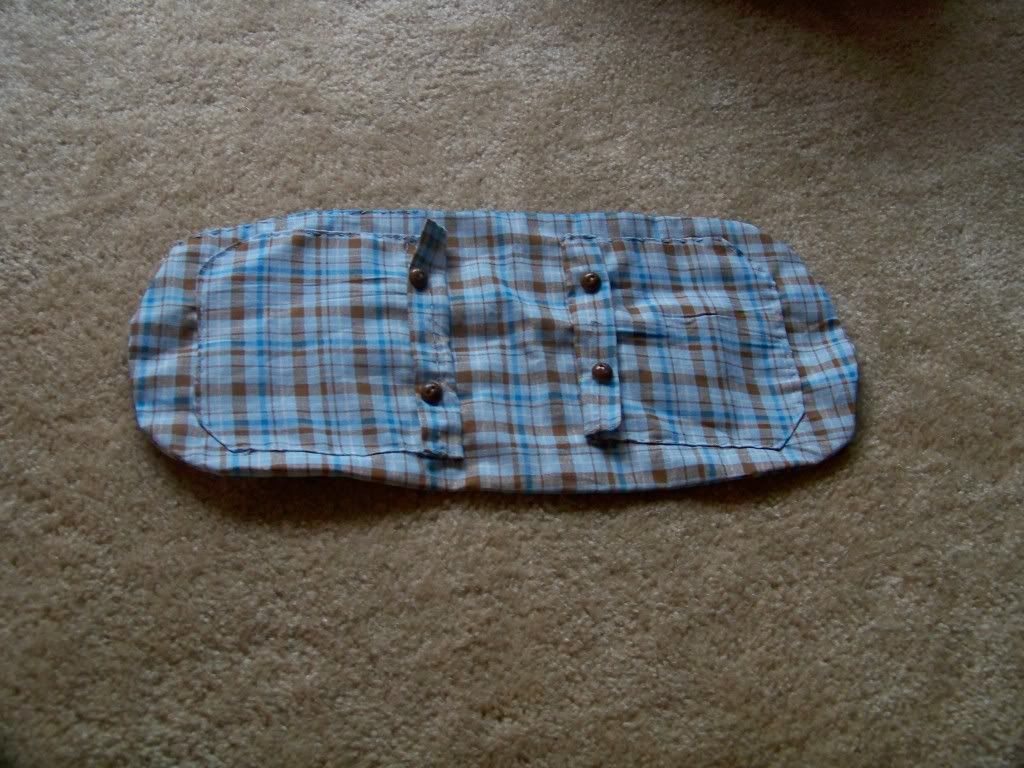
Here is my box. Cut off all flaps, unless you have a short sided box, then leave one long-end flap

                                             Piper is making sure I'm doing it correctly.

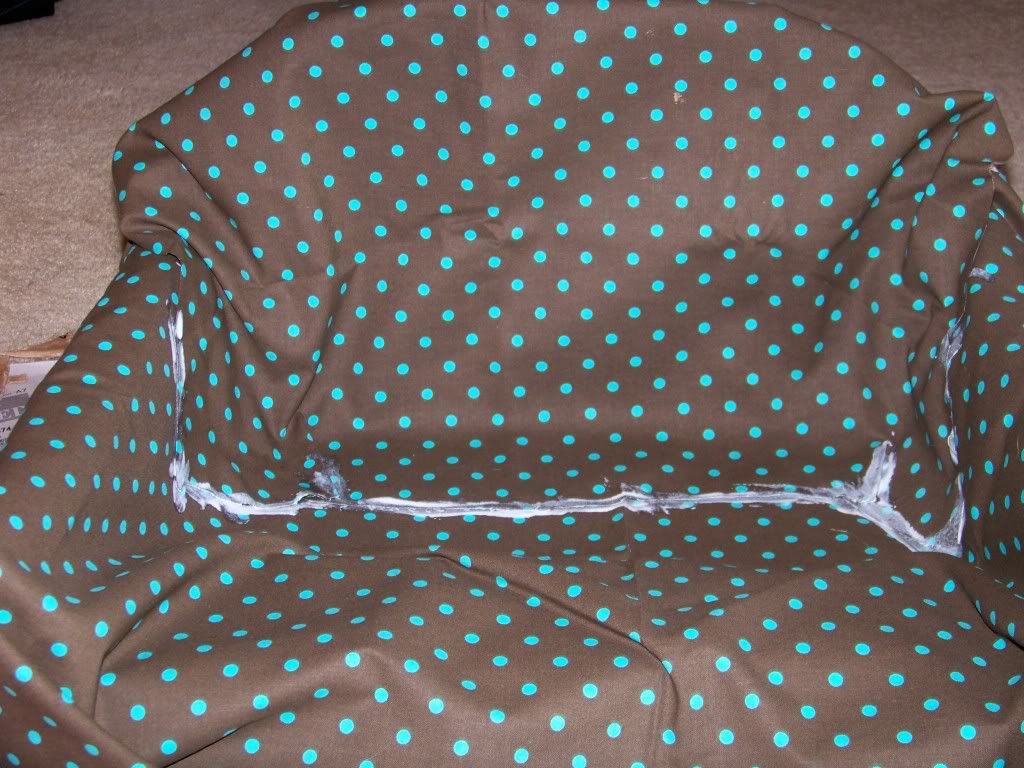
Like this. I ended up cutting off all the flaps. The bottom of mine wasn't complete, it had a gap, so I glued/taped the flaps to the bottom to make it super sturdy.
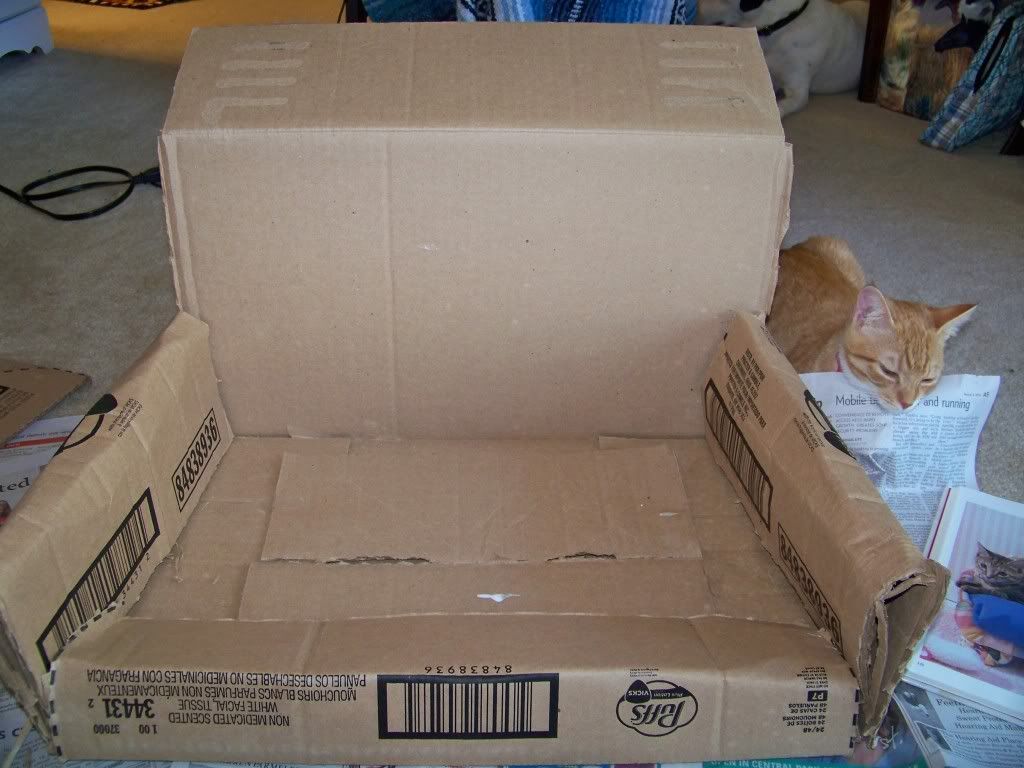
Cut slits in the sides down to about 3" from the bottom of the box, and fold down the sides. Staple or glue where the top of the fold meets the bottom most part of the box. Piper fell aslee, apparently helping is very exhausting.
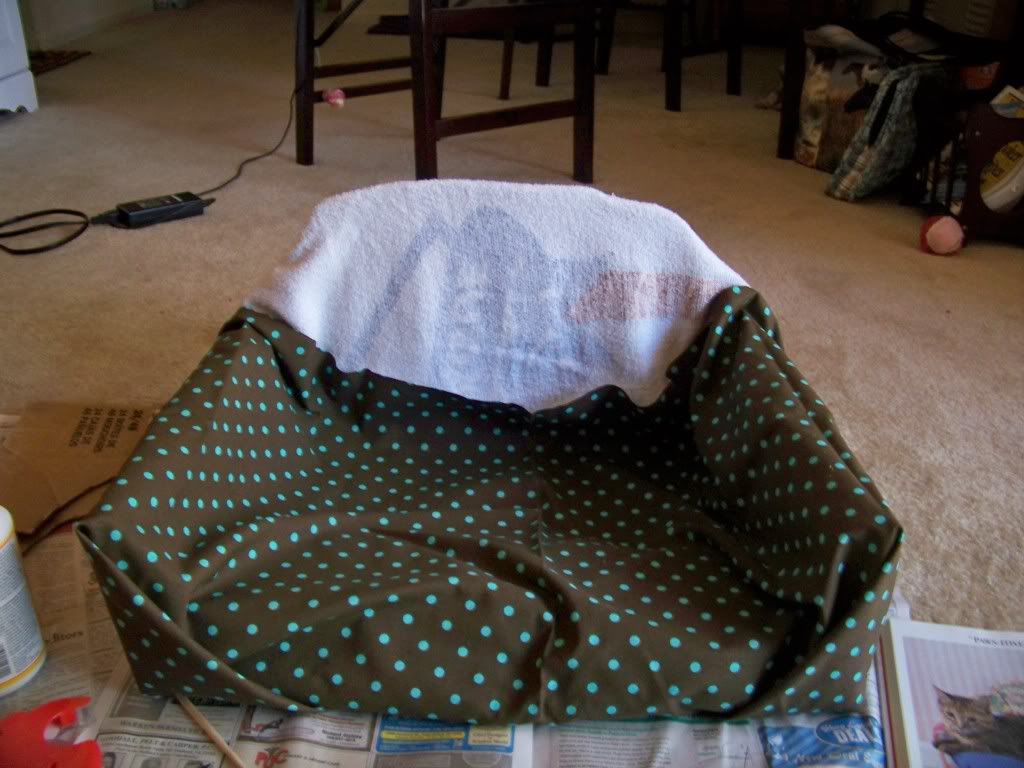
         Cover it with towel/batting, Staple/glue that down. And then cover that with fabric.

Glue your seams, it dries clear, so be generous with it.
                                                                Let it dry completely.
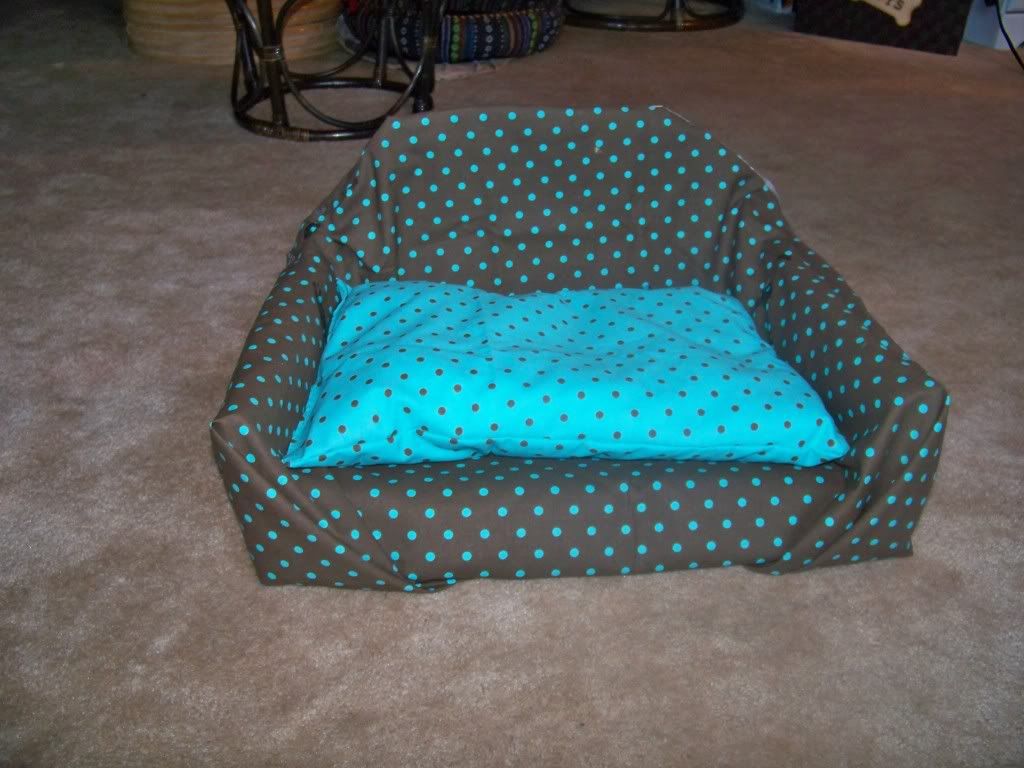
Make a pillow. Then stand back and admire!


I'd love to see your version of this! If you make it, post me a link in comments :)


**anything posted on this blog is for non-commercial use only!**

Saturday, September 3, 2011

Luggage Tag

 We take a vacay up north every year, but this is the first time my boyfriend gets to go with us, so super I'm excited!  To kick-off the vacation preparation, I decided to make new luggage tags (even though we're driving, they're still cute!). Since it took me about ten minutes each (handsewing), I didn't even think to take pictures. It's really simple.

  
Supplies:


A scrap of fabric 2x the size of your desired luggage tag, about a foot of ribbon...and one of those handy-looking bags your sheets come in that you never throw away. (This one actually came from a bath-gift set I got for xmas.....3yrs ago.


Sew it inside-out, flip it rightside out, leave the flat part where the ribbon goes, flip it inside out, stick in the ends of the ribbon, and sew it up. Cut the plactic to fit, sew it on, and pretty-it-up with ribbon across the top of the plastic.

I made one for the boyfriend, too. Oh, heck, I'll probably make one for the critters as well, (they're going to doggie camp while we're on vacay)


Tuesday, August 30, 2011

Doggie Backpack

So my Jack Russel, Chase, is one of those dogs inbetween sizes. If i get a large, I have to redo it smaller, and vis versa with mediums. And since we take him to the park a lot, and do a lot of hiking, I figured he could use a back pack, and after gawking at the $20-$50 price tags, I decided it would be waaayyy easier, and a heck lot cheaper to just make him a back pack. Did I not mention I don't owna sewing machine? Or that I have corpal tunnel in both wrists? This easy project turned into a month-long event. But I did it! and for under $5! ( I had a few old leashes, bc my other dog went through this "I will eat you, leash" phase...) And, I don't measure, I flop the material over whatever I'm making it for and wing it. Did I mention Chase doesn't know he's a JRT? He's very mellow, doesn't even bark!


Ignore the mess on my dinning room table, the epiphany hit me during my morning coffee...
Anyways, thats the foundation of the backpack: a big oval. You need to cut 2, and sew them together.


These are the pockets.


sew the pockets on, add adorable little buttons that really have no purpose, except to hide the mess I made sewing in the snaps...


Add straps, and Tah-Dah!

Saturday, August 27, 2011

Mason Jar Candle Holders

So tea lights look great in all Mason Jars, especially when jars are adorned with ribbon or twine. But with Hurricane Irene threatening my home, and electricity, I need more candle holders for all my emergency candles. Well good thing I have so many half-burned candles, and 1 cup mason jars! I used Drip candles to make the ones below, but I've also used a candle warmer to (safely) melt the wax and then  pour it into jars and insert the emergency candle. (hold it in place with toothpick, advocado-seed style)


I realized as I was taking the pictures that one is crooked, and shorter. My bf hasn't learned yet to burn a set of tapers at the same time, and I have no idea why its crooked, I'll be fixin that now! :)


Advocado seed style:


Photo found here

Sunday, August 21, 2011

Toilet paper rescue, thank you.

So we've all had it happen: it's late at night, you walk into the bathroom to use the lou, and you see the TP roll is empty, you goto change it...and theres no more rolls of toilet paper! Oh, no! It's too late to go to the store, you're out of tissues, (or only have the vicks ones, eek), what to do? Well this is one of the rare occasions I'm thankful I live in an apartment complex. (I love even more that my cousin lives a few buildings down!). So, when someone saves your life like this, how in the world do you thank them? Of course you go buy them a brand new roll the next day, but that doesn't truely express your extreme graditude.

Yeah, that ought to do the trick!

Friday, August 19, 2011

Felt-flower arrangement

So I'm a plant-giver. What better gift? It goes with all decor, and houseplants are very healthy to have around! So when my black-thumbed live-in boyfriend's mother's birthday came up....what to do? Give her a bunch of dead sticks I pick up around the farm everyday, and tie them together with twice that wraps our haybales? Sounds perfect! Cute-it-up with felt flowers, and were good to go!

Start by cutting out your petals. I followed Mrs. Priss' tutorial, but only used one layer of petals.


Mix it up with a few different kinds of flowers and colors, or keep it all uniform.


Saturday, July 9, 2011

birdnest necklace

I made this one as a Mother's Day present to my grandmother. Yes...a late Mother's day present.. I put 4 "eggs" for her 4 children. But you can use as few as one.
Start by beading your "eggs" onto 18''G wire, and then proceed to loop it around the beads until it looks more or less like a nest, and then hook the end of your wire into the bottom of the nest. attach chain, and enjoy :)

Thursday, June 30, 2011

TP flowers

When it's rainy outside, make flowers out of toilet paper rolls! cut, glue, secure, let dry, then decorate!

Saturday, June 25, 2011

First Blog Post

I've been told I over use smiley-face :), oh well! I have never done much blogging, (ok..none) so I'll figure it out as I go. This is to help with my sanity. I'm home alone with the dogs so much, I've gone *barking* mad. Ok, I'll try to keep the dorky puns undercontrol...
<--thats my desk :)

<--thats a trunk I use when my desk gets full when im on a craft binge. I usually end up taking over the dining room table too.